Repainting your car doesn’t have to mean spending thousands at a professional body shop. With the right preparation, tools, and technique, you can achieve impressive results from your own driveway or garage. A budget paint sprayer makes this project accessible to anyone willing to invest time and effort into learning proper techniques.
Many car enthusiasts have discovered that home garage painting delivers satisfying results when done correctly. While professional shops offer convenience, the DIY approach gives you complete control over the process and saves substantial money. This comprehensive guide walks you through everything you need to know about painting your car at home.
Whether you’re refreshing faded paint, covering up minor damage, or completely changing your vehicle’s color, following the right steps makes all the difference. Let’s explore how to transform your car’s appearance using affordable equipment and proven methods.
Gathering Your Essential Tools and Materials
Before starting any paint work, assembling the right supplies ensures smooth progress. A quality budget sprayer forms the foundation of your toolkit, but you’ll need several other items to complete the job properly.
Your paint sprayer should feature adjustable pressure settings and multiple nozzle sizes. HVLP sprayers work excellently for automotive applications because they reduce overspray and waste less paint. Look for models with at least a 600-watt motor for adequate performance.
Additionally, you’ll need automotive-grade paint in your chosen color. Calculate the amount based on your vehicle’s size. Most compact cars require about two to three quarts, while larger vehicles may need up to a gallon. Don’t forget primer and clear coat to complete the system.
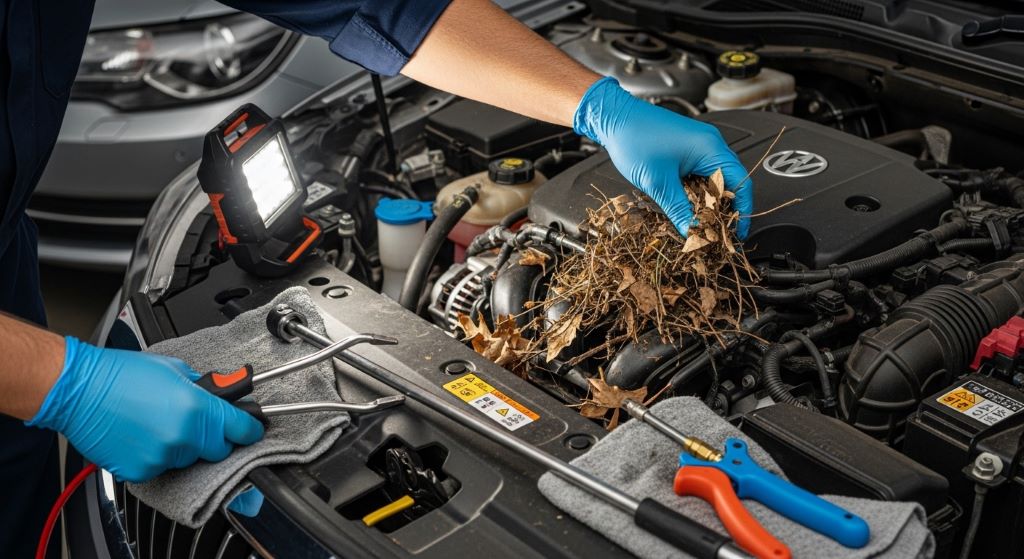
Safety equipment is non-negotiable. Purchase a proper respirator mask rated for paint fumes, not just a dust mask. Safety glasses, disposable gloves, and coveralls protect you from harmful chemicals. Adequate ventilation is equally important, so plan to work in a well-ventilated space.
Preparation supplies include various grits of sandpaper, from 320 to 2000 grit. You’ll also need masking tape, plastic sheeting, cleaning solvents, tack cloths, and mixing cups with measurement marks. A spray gun cleaning kit keeps your equipment functioning properly between coats.
Preparing Your Workspace
The environment where you paint dramatically affects your final results. Even with perfect technique, painting in unsuitable conditions leads to disappointing outcomes. Therefore, creating the right workspace deserves serious attention.
Choose a location with minimal dust and debris. A clean garage works well if you thoroughly sweep and wet down the floor to keep particles from becoming airborne. Remove any items that might collect overspray or create dust when you move around.
Temperature and humidity significantly impact paint application and drying. Ideal conditions range from 65 to 85 degrees Fahrenheit with humidity below 50 percent. Painting in cold temperatures causes the paint to thicken and apply unevenly, while high humidity can create bubbles or a milky appearance.
Lighting makes a tremendous difference in your ability to see imperfections and achieve even coverage. Set up multiple work lights around your vehicle to eliminate shadows. LED shop lights provide bright, consistent illumination without generating excessive heat.
Cover everything you don’t want painted with plastic sheeting and tape. This includes windows, trim, lights, and wheels. Take your time with masking because rushed preparation leads to problems later. Sharp, clean tape lines separate amateur jobs from professional-looking results.
Surface Preparation and Sanding
Proper surface preparation determines whether your paint job lasts for years or fails within months. This stage requires patience and attention to detail, but skipping steps guarantees poor results.
Start by washing your entire vehicle thoroughly with automotive soap. Remove all dirt, grease, wax, and contaminants that might prevent paint adhesion. Pay special attention to areas around door handles, mirrors, and body seams where grime accumulates.
Next, assess the existing paint condition. If the current paint is in good shape, you can sand it to create a mechanical bond for new paint. However, if you find rust, deep scratches, or peeling paint, these issues need addressing before proceeding.
Sanding creates the texture that helps new paint grip the surface. Begin with 320-grit sandpaper to remove the clear coat and create an even surface. Work in overlapping patterns to avoid creating visible lines. The goal is to dull the entire surface, not to sand down to bare metal unless you’re dealing with damage.
After initial sanding, move to 400-grit paper to smooth out any scratches left by the coarser grit. This step creates an ideal surface for primer adhesion. Use a sanding block for flat areas to maintain even pressure and avoid creating waves in the panel.
Clean the surface again after sanding using a tack cloth to remove all dust. Any particles left behind will show up as imperfections in your final paint. Some painters also use a grease and wax remover at this stage for additional insurance.
Applying Primer Correctly
Primer serves multiple purposes in the painting process. It fills minor imperfections, provides excellent adhesion for topcoats, and creates a uniform base color. Using primer correctly sets up everything that follows.
Mix your primer according to the manufacturer’s instructions. Most automotive primers require a hardener and thinner to achieve the proper consistency. The mixture should flow smoothly from your sprayer but not run when applied to vertical surfaces.
Set your spray gun pressure between 25 and 30 PSI for most HVLP systems. Test spray on a piece of cardboard to ensure proper atomization. The paint should form a fine mist without spitting or creating large droplets.
Hold the sprayer about six to eight inches from the surface. Move in smooth, overlapping passes at a consistent speed. Maintain perpendicular angles to the surface rather than arcing your arm, which creates uneven coverage.
Apply primer in two to three light coats rather than one heavy coat. Heavy applications cause runs and sags that are difficult to fix. Allow each coat to flash off for about 15 minutes before applying the next layer.
After the final primer coat dries completely, sand it lightly with 600-grit sandpaper. This creates the perfect surface for your color coats. Clean thoroughly with a tack cloth before moving to the next stage.
Mastering the Color Coat Application
The color coat represents the most visible part of your work. This stage requires steady hands, patience, and careful attention to technique. Fortunately, the skills you developed during priming transfer directly to this phase.
Thoroughly mix your paint and add any required hardeners or reducers. The exact ratios vary by product, so follow the specific instructions for your chosen paint system. Mix more than you think you’ll need because running out mid-job creates problems.
Strain the mixed paint through a filter before pouring it into your spray gun. This simple step removes any lumps or contaminants that could clog your nozzle or create imperfections in the finish.
Begin spraying from the top of the vehicle and work downward. This prevents overspray from settling on freshly painted surfaces. Use the same overlapping technique you practiced with primer, maintaining consistent distance and speed.
Three to four light coats typically provide better coverage and depth than fewer heavy coats. Watch for a wet, glossy appearance that indicates proper application. If you see dry, dusty spots, you’re either spraying too far away or moving too quickly.
Common mistakes include stopping or starting your spray while pointing at the panel. Always begin your motion before pulling the trigger and keep moving after releasing it. This technique prevents heavy spots at the beginning and end of each pass.

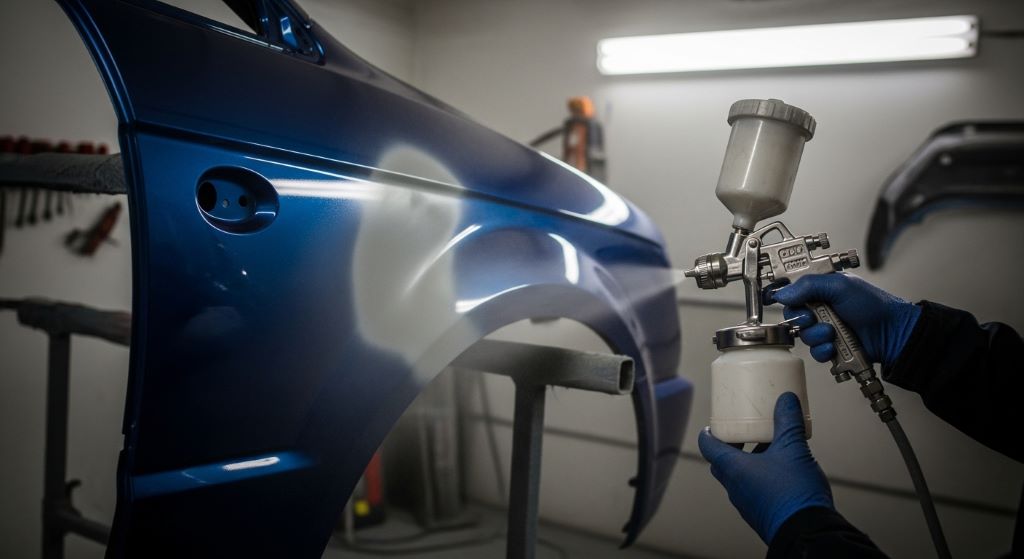
Adding Clear Coat for Protection and Shine
Clear coat protects your color and provides the glossy finish that makes paint jobs look professional. This final layer deserves the same careful attention you gave to previous steps.
Most automotive clear coats come in two-part systems requiring a hardener. Mix according to instructions and strain before use. Clear coat typically requires a slightly higher fluid output than base coat, so adjust your sprayer settings accordingly.
Apply clear coat using the same techniques you mastered during color application. However, you can apply slightly heavier coats since there’s no risk of color mismatch. Still, avoid runs by building coverage gradually.
Two to three coats of clear provide adequate protection for most applications. Allow proper flash time between coats, usually 15 to 20 minutes. The surface should feel dry to a light touch before applying additional layers.
The final clear coat can be slightly heavier than previous layers. This creates the depth and wetness that characterizes high-quality paint jobs. However, remain vigilant for runs, especially on vertical surfaces.
After completing your clear coat, resist the temptation to touch the paint. Allow at least 24 hours of drying time before removing masking tape. Full cure takes up to two weeks, during which you should avoid washing or waxing the vehicle.
Wet Sanding and Buffing for Show Quality Finish
Once your paint has cured for at least a week, you can enhance the finish through wet sanding and polishing. These optional steps take your results from good to spectacular.
Start with 1500-grit wet sandpaper to level any orange peel texture or minor imperfections. Use plenty of water and gentle pressure. The goal is to create a perfectly flat surface, not to cut through the clear coat.
Progress to 2000-grit paper to remove the scratches left by the previous grit. At this point, the surface should feel glass-smooth but will appear dull and cloudy. Don’t worry, as this is completely normal.
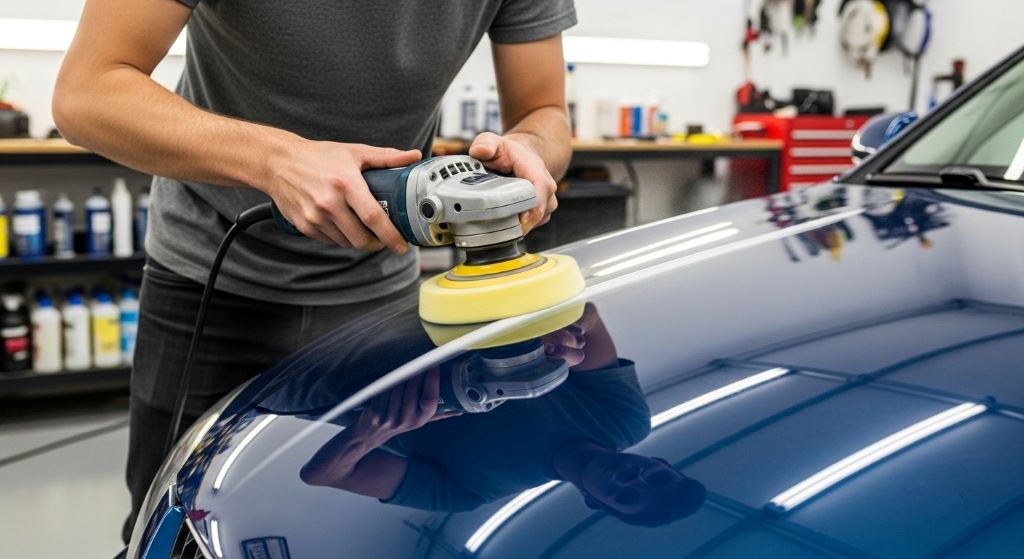
Compound brings back the shine after wet sanding. Apply automotive rubbing compound with a buffer or by hand using circular motions. Work in small sections, removing the haze created by sanding.
Follow compounding with polish to enhance gloss and remove any fine scratches left by the compound. This step really makes the paint pop with depth and clarity.
Finally, apply a quality automotive wax or sealant to protect your hard work. This final layer shields the paint from environmental damage and makes future cleaning easier.
Troubleshooting Common Issues
Even experienced painters encounter problems occasionally. Understanding how to address common issues saves your project when things don’t go perfectly.
Runs and sags occur when you apply too much paint in one area. If you catch them while wet, you can sometimes blend them out. Otherwise, let them dry completely, sand them level, and repaint the area.
Orange peel texture results from paint not flowing out smoothly. This can stem from incorrect thinning, improper sprayer settings, or unsuitable conditions. Wet sanding and buffing can minimize this texture after the paint cures.
Dust contamination happens despite your best efforts. Remove large particles while the paint is still wet using the tip of a clean brush. Smaller particles can be sanded out after the paint cures.
Color mismatch or blotchiness suggests inadequate mixing or inconsistent application. Ensure thorough mixing before starting and maintain consistent technique throughout the job.
Conclusion
Painting your car at home with a budget sprayer is an achievable project that delivers rewarding results. Success depends on thorough preparation, proper technique, and patience throughout the process. This comprehensive car paint job guide demonstrates that professional-looking results don’t require professional equipment or facilities.
Remember that preparation consumes more time than actual painting, but this groundwork determines your final outcome. Invest effort in creating the right environment, properly preparing surfaces, and practicing your spray technique. These auto refinishing tips will serve you well throughout the project.
Additionally, don’t rush the process. Allow adequate drying time between coats and resist the urge to handle freshly painted surfaces. The investment of a few extra days results in paint that lasts for years.
With practice and attention to detail, your home garage painting project can rival professional results at a fraction of the cost. The skills you develop during this project transfer to future automotive work, making you more capable and confident with each attempt.
Frequently Asked Questions
How long does a DIY car paint job typically last?
A properly executed DIY paint job can last five to ten years or more with proper care. The key factors are thorough surface preparation, using quality automotive paint products, and applying adequate clear coat protection. Regular washing and waxing extends the life of your paint work. However, shortcuts in preparation or using inferior products will significantly reduce longevity.
Can I paint my car outside or do I need a garage?
You can paint outside if weather conditions are ideal and you can control dust and debris. Choose a calm day with temperatures between 65 and 85 degrees and low humidity. However, a garage provides better control over environmental factors and protects your work from unexpected weather, insects, and airborne contaminants. If painting outside, work in shaded areas to prevent the paint from drying too quickly.
How much does it cost to paint a car yourself?
Budget DIY car painting typically costs between 300 and 600 dollars for materials, including a basic sprayer, paint, primer, clear coat, and supplies. This represents significant savings compared to professional jobs that often cost 1,000 to 5,000 dollars. Your exact cost depends on vehicle size, paint quality, and whether you already own tools like sanders and compressors.
Do I need a professional spray gun or will a budget model work?
Budget spray guns in the 100 to 300 dollar range work perfectly fine for DIY projects. Look for HVLP models with adjustable settings and decent reviews. While professional guns offer some advantages in speed and atomization, they’re not necessary for achieving good results. Proper technique matters more than expensive equipment for home projects.
How do I avoid orange peel texture in my paint?
Orange peel happens when paint doesn’t flow out smoothly before drying. Prevent it by properly thinning your paint according to manufacturer specifications, maintaining correct spray distance and speed, and ensuring appropriate temperature and humidity. If orange peel appears, you can wet sand and buff the cured paint to achieve a smoother finish. Practice on scrap panels helps you dial in the right technique.
Related Topics:
How to Lubricate Moving Parts on Your Garage Door for Smooth Operation: A Complete Homeowner’s Guide
Designing a Metal Livestock Shelter for Specific Animal Needs: A Complete Guide for Farmers and Ranchers