Introduction: Why Replacing Brake Pads is Essential for Your Safety
Brakes are the unsung heroes of your vehicle, silently working to keep you safe on the road. Yet, when they fail, the consequences can be catastrophic. According to the National Highway Traffic Safety Administration (NHTSA), brake-related issues contribute to nearly 22% of all vehicle accidents in the United States. Among these, worn-out brake pads are a leading culprit. Knowing how to replace car brake pads can empower you to maintain your vehicle’s safety and prevent potential accidents.
Replacing brake pads isn’t just about saving money on mechanic bills; it’s about ensuring your safety and the safety of others. In this guide, we’ll walk you through everything you need to know about replacing car brake pads—from identifying when it’s time to change them to step-by-step instructions for doing it yourself. Whether you’re a seasoned DIY enthusiast or a first-timer, this article will equip you with the knowledge and confidence to tackle this critical task.
Understanding Brake Pads: What Are They and How Do They Work?
What Are Brake Pads?
Brake pads are friction materials that press against the brake rotors to slow down or stop your vehicle. They are made from a variety of materials, including ceramic, semi-metallic, and organic compounds. Each type has its own advantages and disadvantages, which we’ll explore later in this article.
How Do Brake Pads Function?
When you press the brake pedal, hydraulic pressure forces the brake calipers to clamp the brake pads onto the rotors. This friction converts kinetic energy into heat, slowing the vehicle. Over time, this process wears down the brake pads, requiring replacement.
Statistics on Brake Pad Lifespan
On average, brake pads last between 30,000 and 70,000 miles, depending on driving habits, vehicle type, and environmental conditions. Aggressive braking, frequent stops, and towing heavy loads can significantly reduce their lifespan.
Signs It’s Time to Replace Your Brake Pads
Ignoring worn brake pads can lead to costly repairs and dangerous situations. Here are some telltale signs that it’s time for a replacement:
- Squeaking or Squealing Noises : Many modern brake pads come with wear indicators that produce a high-pitched sound when they’re nearing the end of their life.
- Grinding Sounds : If you hear grinding noises, it means the brake pads are completely worn out, and the metal calipers are now rubbing against the rotors. This requires immediate attention.
- Increased Stopping Distance : If your car takes longer to stop than usual, it could indicate worn brake pads.
- Vibration in the Brake Pedal : This often points to uneven wear or warped rotors, both of which require professional inspection.
- Dashboard Warning Light : Some vehicles have sensors that trigger a warning light when the brake pads are low.
Pros and Cons of DIY vs Professional Brake Pad Replacement
DIY Replacement
Pros:
- Cost-effective: You save on labor costs, which can range from 100to300 per axle.
- Learning opportunity: Gaining hands-on experience boosts your confidence and mechanical skills.
- Convenience: You can work at your own pace without relying on a mechanic’s schedule.
Cons:
- Risk of mistakes: Incorrect installation can compromise braking performance.
- Time-consuming: For beginners, the process may take several hours.
- Limited tools: You might need to invest in specialized tools, such as a torque wrench or brake piston compressor.
Professional Replacement
Pros:
- Expertise: Mechanics have the training and tools to complete the job quickly and correctly.
- Warranty: Most shops offer warranties on parts and labor.
- Peace of mind: Professionals ensure all components are inspected and functioning properly.
Cons:
- Expensive: Labor costs can double the overall expense.
- Waiting time: Scheduling an appointment and waiting for the repair can be inconvenient.
- Lack of transparency: Some mechanics may upsell unnecessary services.
Step-by-Step Guide to Replacing Brake Pads Yourself
Tools and Materials Needed
Before you begin, gather the following tools and materials:
- Jack and jack stands
- Lug wrench
- Socket set
- C-clamp or brake piston compressor
- Brake cleaner
- New brake pads
- Anti-seize lubricant
- Torque wrench
Step 1: Prepare Your Vehicle
Park your car on a flat surface and engage the parking brake. Loosen the lug nuts slightly before lifting the vehicle with a jack. Secure it with jack stands for safety.
Step 2: Remove the Wheel
Once the car is elevated, remove the lug nuts and take off the wheel to access the brake caliper.
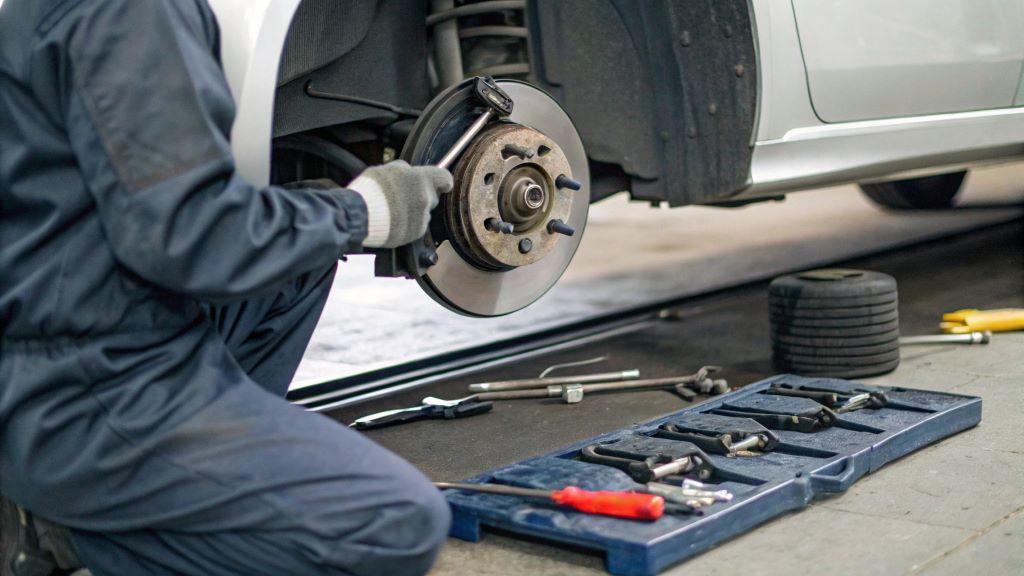
Step 3: Inspect the Brake Assembly
Examine the brake pads, rotors, and calipers for any signs of damage or excessive wear. Replace any compromised components.
Step 4: Remove the Old Brake Pads
Unbolt the brake caliper and carefully slide it off the rotor. Use a C-clamp or brake piston compressor to retract the caliper piston. Remove the old brake pads.
Step 5: Install the New Brake Pads
Apply anti-seize lubricant to the back of the new brake pads and insert them into the caliper bracket. Reattach the caliper and tighten the bolts to the manufacturer’s specifications.
Step 6: Reassemble and Test
Reinstall the wheel, lower the vehicle, and pump the brake pedal several times to seat the new pads. Take the car for a test drive to ensure proper braking performance.
Choosing the Right Brake Pads for Your Vehicle

Types of Brake Pads
- Ceramic Pads : Known for their quiet operation and minimal dust production, ceramic pads are ideal for everyday drivers.
- Semi-Metallic Pads : These offer excellent stopping power and durability but can be noisy and generate more dust.
- Organic Pads : Made from natural materials, organic pads are gentle on rotors but wear out faster.
Factors to Consider
- Driving style: Aggressive drivers may benefit from semi-metallic pads.
- Climate: Ceramic pads perform well in extreme temperatures.
- Budget: Organic pads are typically the most affordable option.
Common Mistakes to Avoid When Replacing Brake Pads
- Skipping the Inspection : Failing to check the rotors and calipers can lead to premature pad wear.
- Over-Tightening Bolts : This can damage the caliper or cause uneven braking.
- Neglecting Lubrication : Applying anti-seize lubricant prevents squeaking and ensures smooth operation.
- Using Inferior Parts : Cheap brake pads may save money upfront but compromise safety and longevity.
The Essential Guide to Understanding the Role of Transmission Parts in Vehicle Performance
FAQs About Replacing Car Brake Pads
-
How Often Should I Replace My Brake Pads?
Most brake pads last between 30,000 and 70,000 miles, but this varies based on driving habits and conditions.
-
Can I Replace Just One Set of Brake Pads?
It’s recommended to replace both sets on the same axle to maintain balanced braking.
-
Do I Need to Replace the Rotors Too?
Not always. If the rotors are in good condition, they can be resurfaced instead of replaced.
-
How Much Does It Cost to Replace Brake Pads?
DIY costs range from 50to150 per axle, while professional services cost 200to500.
-
What Happens If I Don’t Replace Worn Brake Pads?
Driving with worn brake pads can damage the rotors and calipers, leading to costly repairs and unsafe driving conditions.
-
Can I Drive With the Parking Brake On After Replacing Pads?
No, this can cause overheating and damage the new pads.
-
Should I Bed-In New Brake Pads?
Yes, bedding-in helps transfer a thin layer of pad material onto the rotors for optimal performance.
-
Is It Safe to Replace Brake Pads Without Professional Help?
Yes, if you follow the instructions carefully and use the right tools.
-
Why Do My Brakes Squeak After Replacement?
This could be due to improper installation, lack of lubrication, or cheap-quality pads.
-
Can I Mix Different Types of Brake Pads?
No, mixing types can lead to uneven braking and reduced performance.
Conclusion: Empower Yourself with Knowledge and Confidence
Replacing car brake pads is a manageable task that every driver should consider learning. Not only does it save money, but it also deepens your understanding of your vehicle’s inner workings. Armed with the right tools, knowledge, and patience, you can ensure your brakes perform optimally and keep you safe on the road. Remember, regular maintenance is key to extending the life of your vehicle and avoiding costly repairs down the line.
By following this guide, you’ll not only gain practical skills but also contribute to a safer driving experience for yourself and others. Happy wrenching!
Read More:
6 Signs Your Heavy-Duty Truck Needs Diagnostics: Don’t Ignore These Warnings
Upgrading Your Diesel Truck’s Cooling System: The Key to Performance and Reliability